How to add an email signature in Outlook

How to add an email signature in Outlook
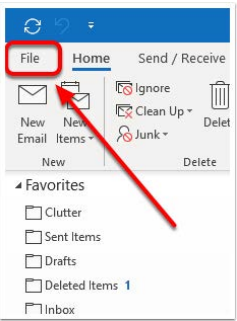
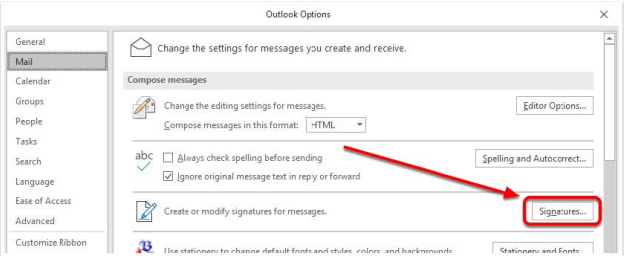
- In Outlook, click on File at the top left.
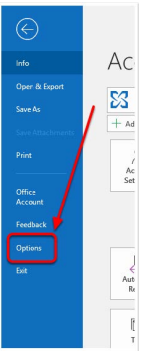
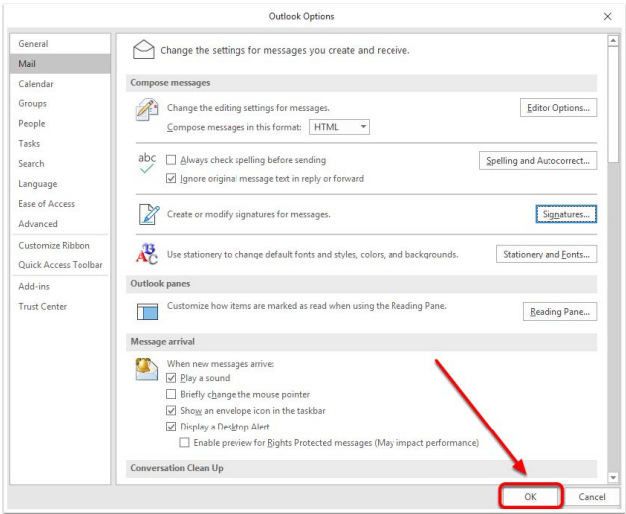
- Select Options
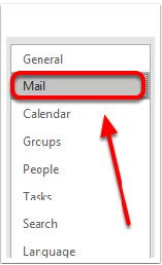
- Select Mail
- Select Signatures
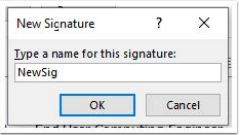
- Select New

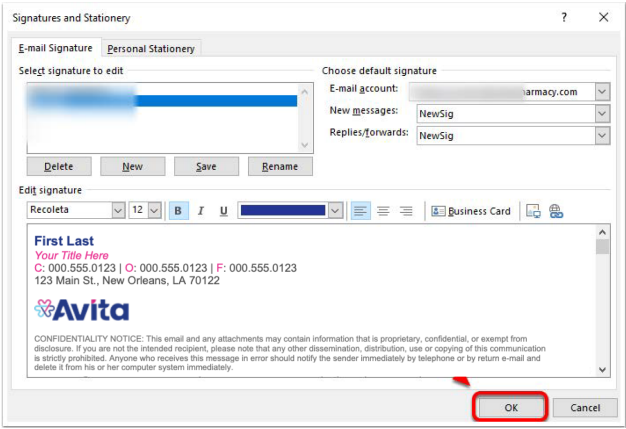
- Enter a name for your signature. It can be anything. i.e., "NewSig"
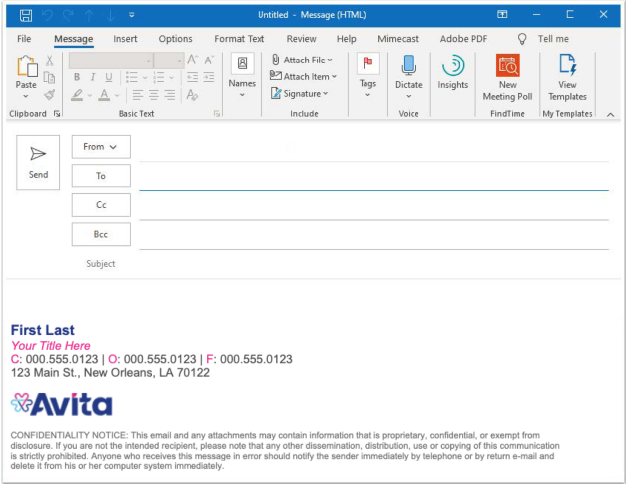
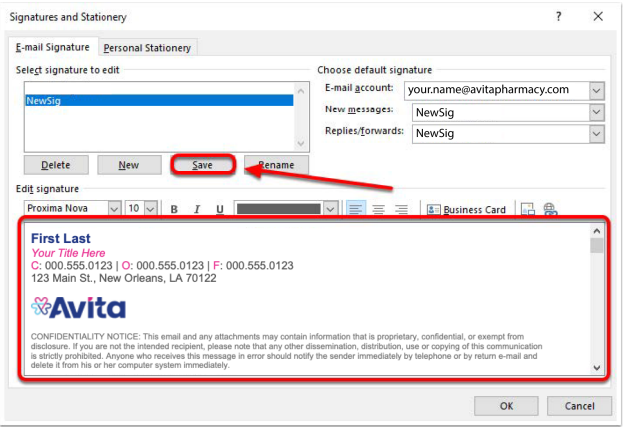
- With the "NewSig" name highlighted, paste the signature template you copied from the email into the box, as seen in red below. Then input the correct information for Name, Title, Number(s), and Address. Click "Save".
 NOTE: With our recent brand refresh, all team members should review our recently updated email signature guidelines to ensure they follow our brand standards. This ensures that no matter whom a teammate, patient, partner, or community member emails with, they recognize our brand identity and have a consistent visual experience.Over the next few months, the email addresses for some team members will transition to more closely identify with the brand their specific department and location aligns to. Please see the table below, which outlines our new brand family, the departments and locations aligned to each brand, and the current and future email address setup:
Brand
Departments & Locations Aligned to Brand
Current Email Address
Future Email Address
Avita Care Solutions
Corporate/shared services:
- Account Management
- Accounting/ Finance and 340B Finance
- Administrative Services
- Compliance
- Facilities
- Information Technology and Business Intelligence
- Legal
- Marketing
- Sales
firstname.lastname
@avitapharmacy.comfirstname.lastname
@avitacaresolutions.comAvita Pharmacy
All Avita Pharmacy locations, including Avita Pharmacy 1046 at the AvitaCare Atlanta location
firstname.lastname
@avitapharmacy.comRemains the same:
firstname.lastname
@avitapharmacy.comAvitaCare Atlanta
AvitaCare Atlanta clinical care providers and team members
firstname.lastname
@avitapharmacy.comfirstname.lastname
@avitacareatlanta.comQ Care Plus
Q Care Plus Medical Services and Operations, including:
- Customer Service
- Data Analytics
- Product Development
firstinitiallastname
@qcareplus.comfirstname.lastname
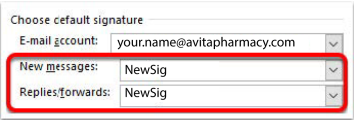
@qcareplus.com - Before you close out of that window, select your new signature in both dropdowns beside New messages and Replies/forwards to ensure your new signature is set as the default.
- After inputting everything, select OK to apply the new signature.
- Select OK again to apply mail options
- Test that your new signature has been applied by trying a New Email
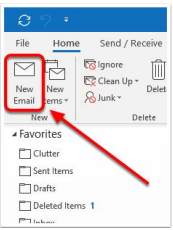
- If your new signature was set correctly, you will see your signature similar to the screenshot below. If this doesn't look correct, please start from the beginning of this guide to verify all information is set correctly. If you're still having trouble, reach out to [email protected]