Using CaptureOnTouch with your Canon Scanner

Using CaptureOnTouch with your Canon Scanner
This guide will walk you through using CaptureOnTouch the first time and changing any specific settings for new shortcut options outside of PioneerRx.
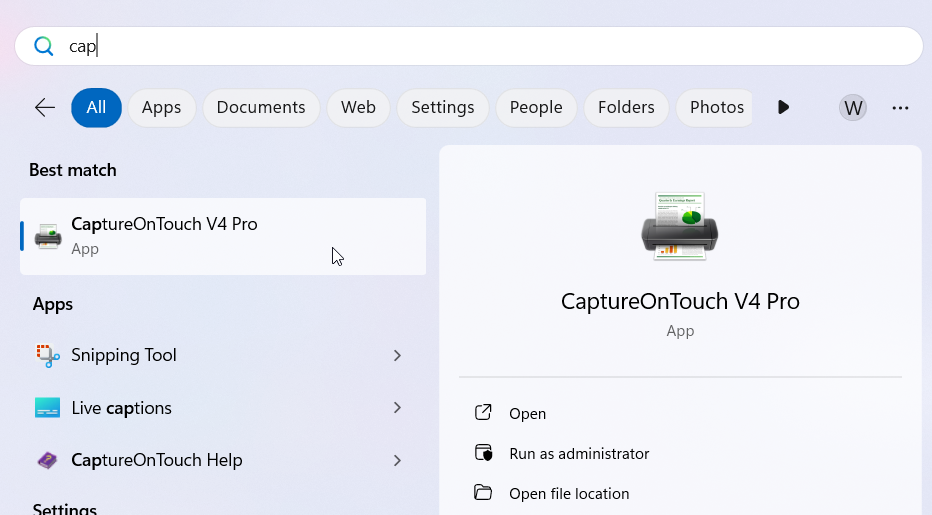
- Open CaptureOnTouch:
To open CaptureOnTouch, search in your Start Menu for CaptureOnTouch as seen below
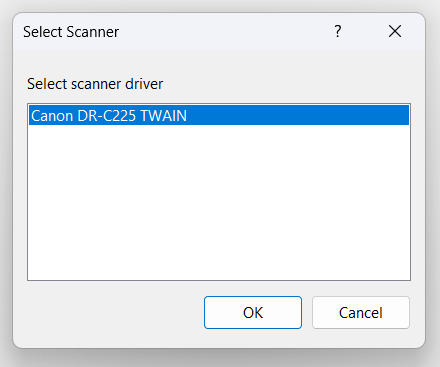
- Select TWAIN driver:
The first time you launch CaptureOnTouch, it will prompt you to select the TWAIN driver as seen below:
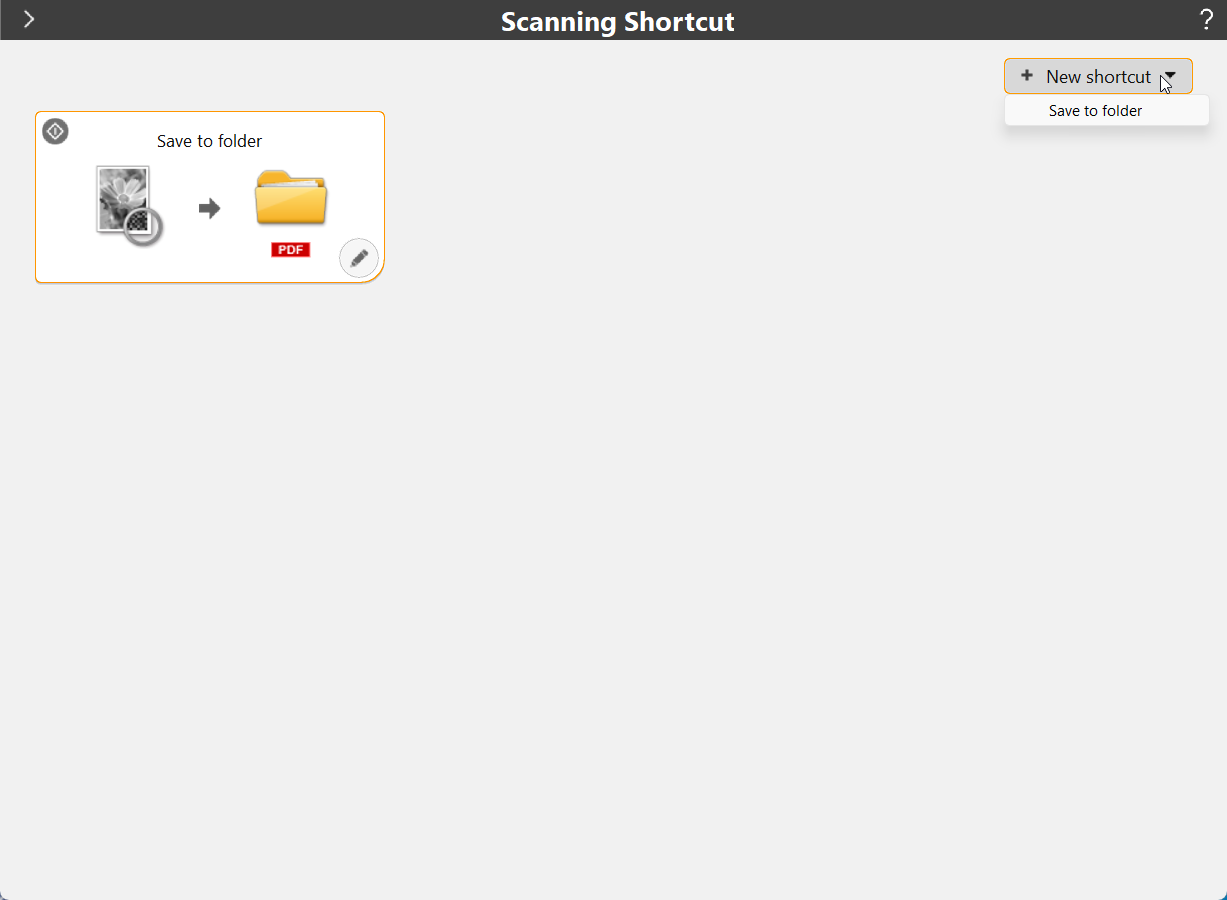
- Create new shortcut for scanning options.
Select New Shortcut and then Scan to folder:
- Edit shortcut options.
Select the pencil icon to open the available options to scan with:
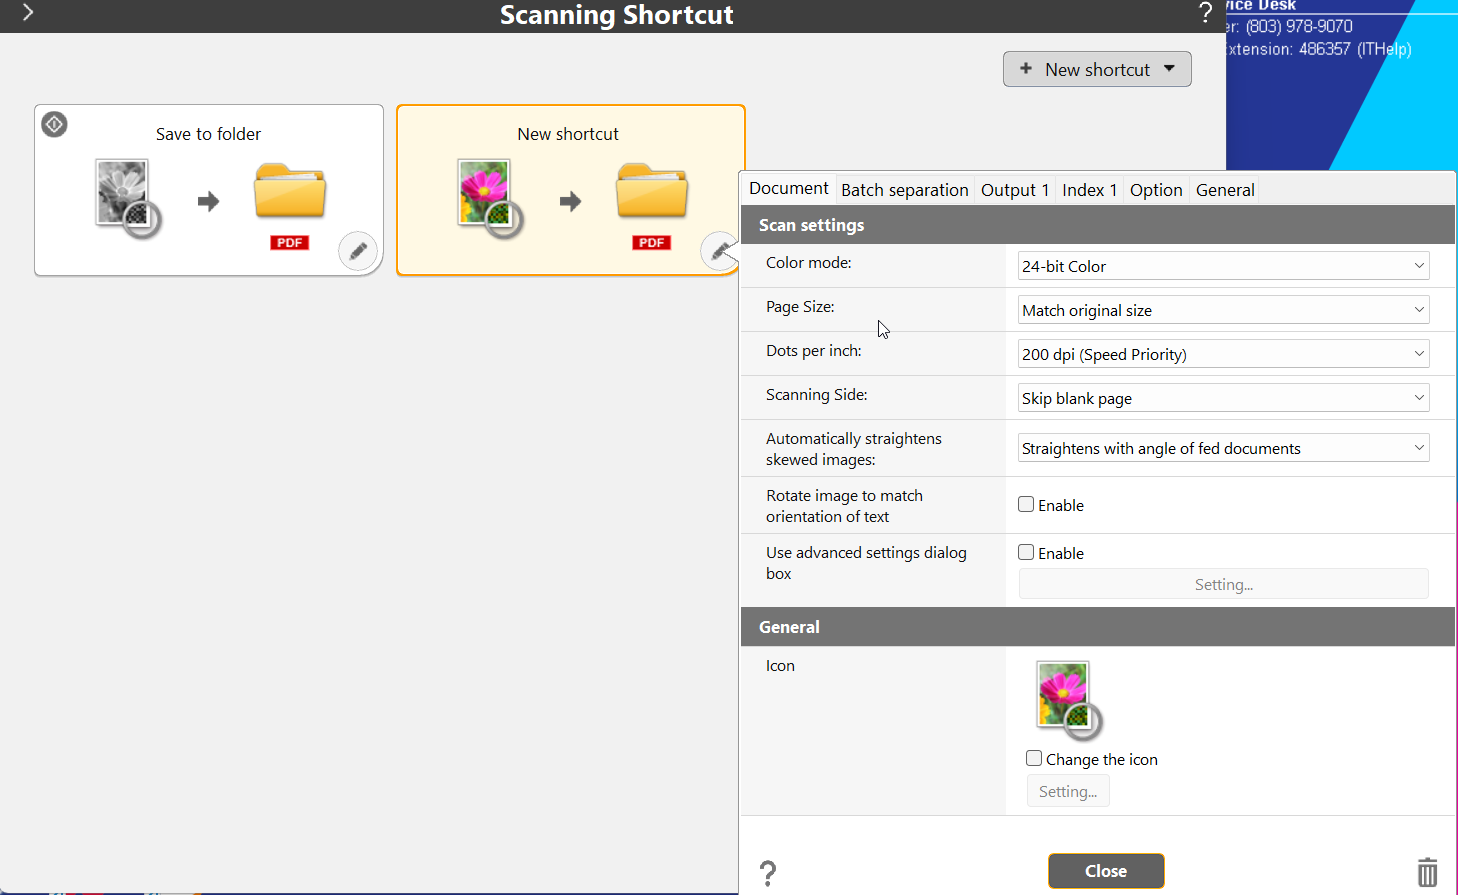
- Change output to a specified folder.
Select the Output 1 tab and then change the dropdown for Save in folder to the desired path of where you want the scanned document/image to be saved to:

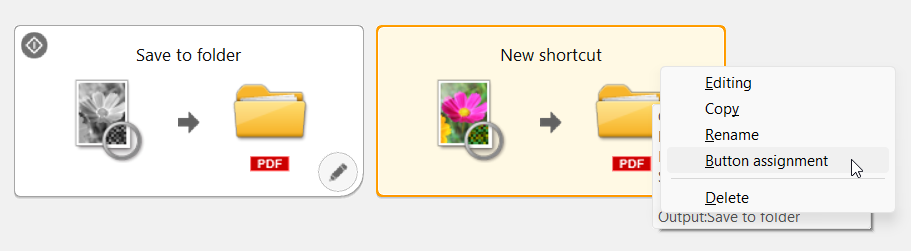
- Set Automatic button assignment.
If your Canon Scanner has a scan button on it, you can right click the shortcut you use most often and select Button assignment from the list. This will allow you to simply press the button on the scanner to scan with these specific options set on that shortcut.
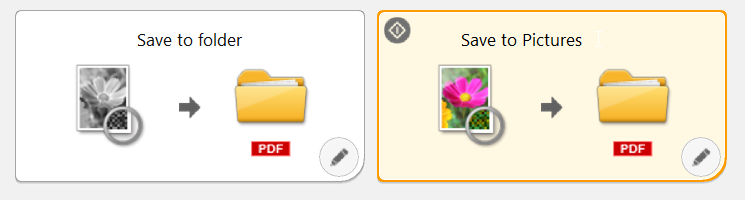
- Rename scan shortcut.
To rename the shortcut you can click on its current name or right click and select Rename. You will then be able to delete and type out a new name in this field.
- Finish scanned document.
Once you scan in the documents using the scan button or left clicking a shortcut, it will present you with a preview window as seen below. Select Finish when you are done scanning to create the document/image in the folder that was set under the Output on that shortcut.
