Jamf Pro: End User Pre-Stage Enrollment Guide

How to Complete PreStage Enrollment in Jamf Pro
Step 1: Turn on Your Mac
- Unbox your Mac and press the power button to turn it on.
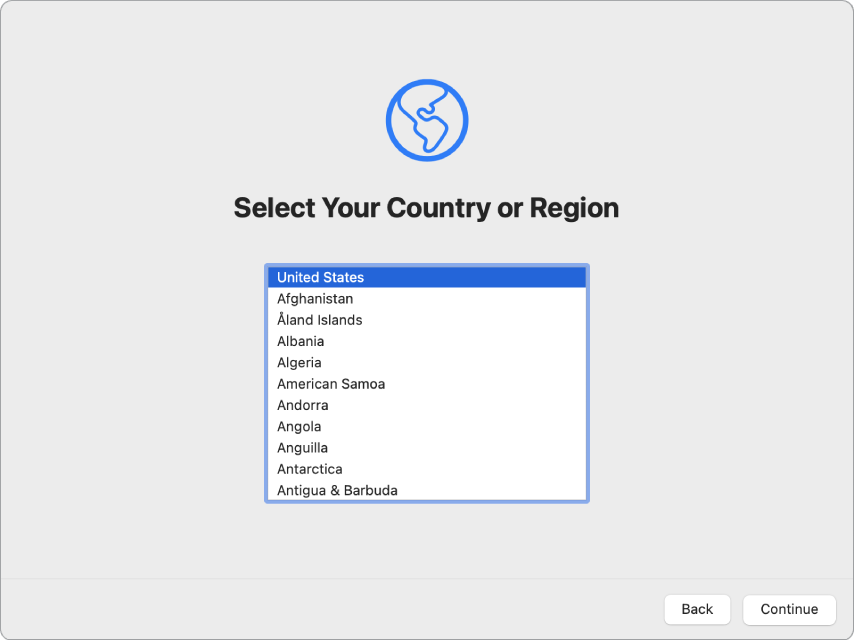
- Select your Region and language

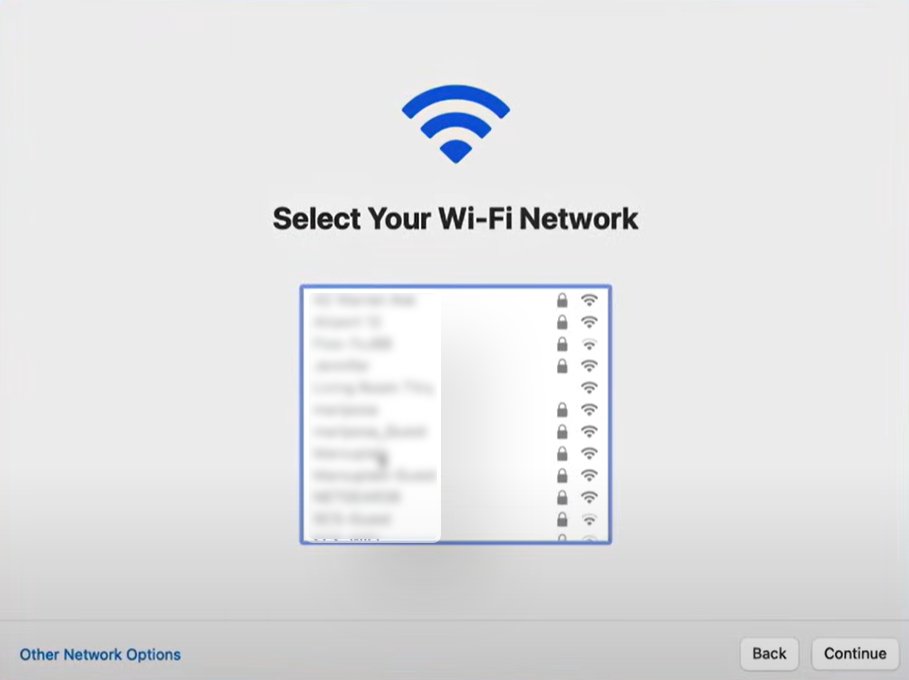
- Connect to Wi-Fi.
Step 2: Begin Setup Assistant
- Follow the on-screen instructions in the Setup Assistant Out of Box Experience.
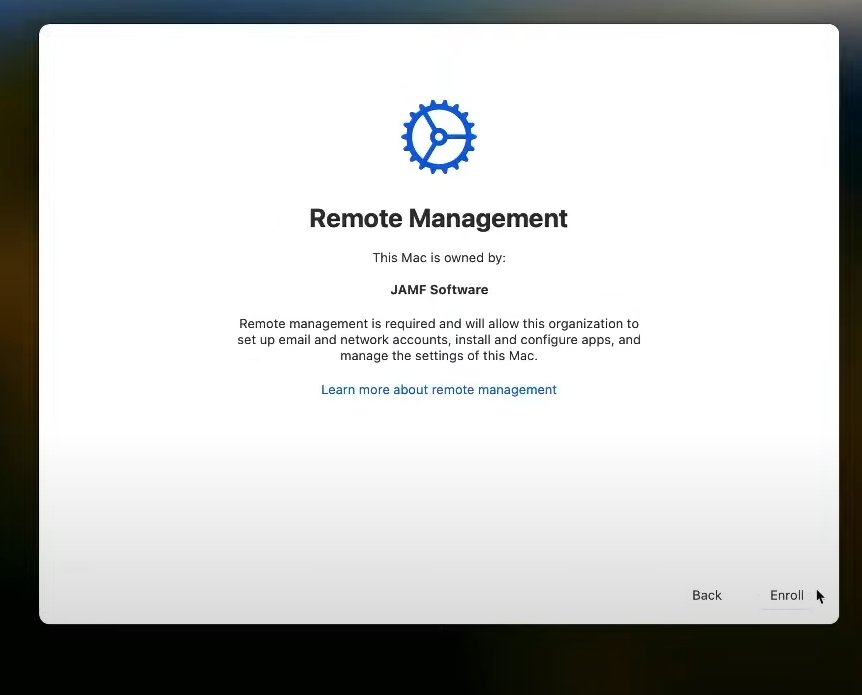
- When you reach the Remote Management screen, click Continue or Enroll.
Step 3: Authenticate
- Enter your Avita email and password.
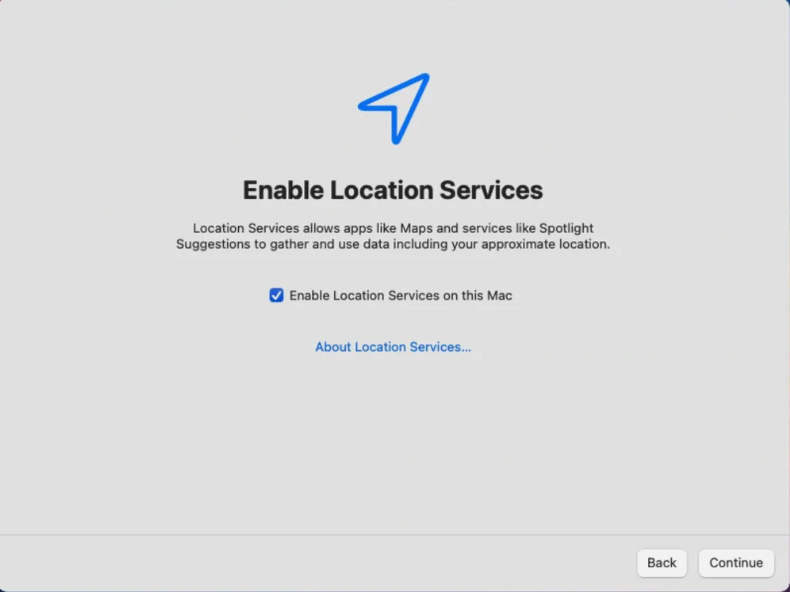
- Enabled Location Services, Click Continue
- Click Next to proceed.
Step 4: Complete Setup
- Follow the remaining steps in the Setup Assistant to complete the setup of your Mac.
- Your Mac will automatically install the necessary configuration profiles and software.
Step 6: Jamf Connect
- After Enrollment is complete give it about 20 min to finish installing and configuring the rest of the setup.
- After this period the Jamf Connect icon should appear in the top right hand system tray. Click it and then click Connect.
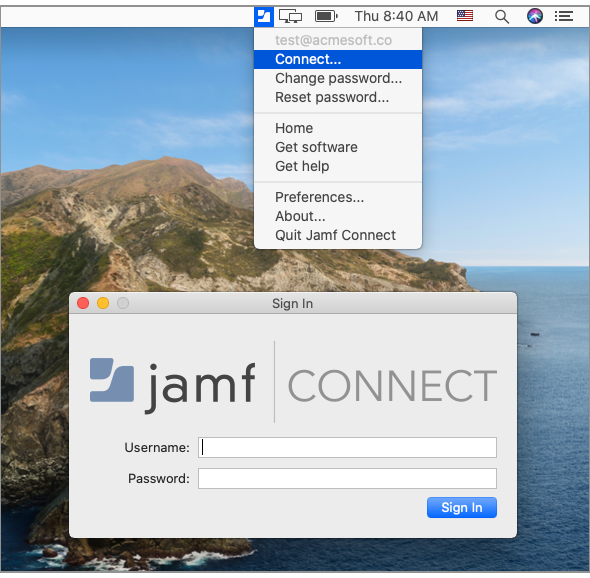
- Login and enter your organization credentials (Email and password)
- Follow the prompts to sync your local Mac Password with your organization password
- After sync is complete you will see that your Local Mac sign in is now synced with your Avita Credentials. You can now sign in using the same password you use for your Avita Email and Utilities.
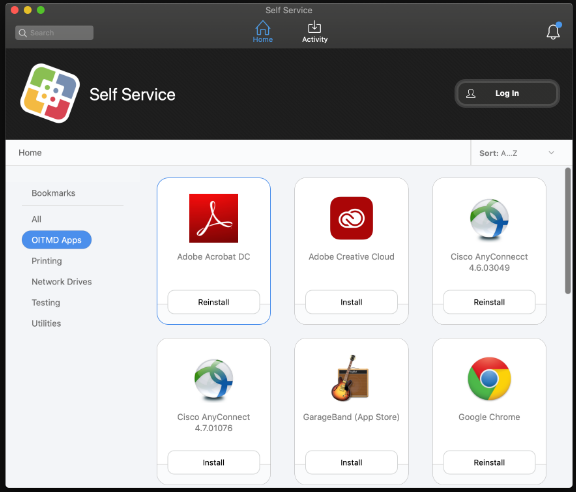
Step 7: Self Service
- Self Service is an app that gets automatically installed after enrollment which allows users to install company approved apps themselves without ITs assistance.
- You can search the App Catalog for any additional apps you may need and if you dont see an app you need in self service or that was automatically installed you can request it from IT. Request it from IT via Avita Service Connect
Step 8: Using AirDrop to Migrate files, photos ,and documents From old Mac
- Make sure both Macs are within Bluetooth and Wi-Fi range.
- Launch AirDrop on both Macs (it's found in the Finder, or by pressing Command+Shift+R).
- Select the files you want to transfer on the old Mac.
- Drag and drop the files onto the AirDrop icon of the receiving Mac.
- The receiving Mac will ask to accept the transfer.
Step 9: Syncing Bookmarks, Passwords, and favorites over from old computer browsers
Sign into your Avita iCloud account to sync over any saved account details.
These all can be carried over from the old device if you used Chrome or Edge. Please click on the link below to view a guide on how to create/sync over from your old computer
https://help.avitarx.com/article/p9hog7logu-syncing-favorites-and-passwords-in-edge