NOTE: Before creating a new extension for a new hire, It is always a great help to ask the manager who they would like to mirror the account off of, this will determine what ring groups as well as park locations, etc. Determine if the site is currently using "Named" user extensions or "Shared" user extensions. In other words, if all extensions are using something like "RPH_1" or "TECH_1".
Helpful Hint: I usually open sessions of Ring Central for you will have to gather information for other customers already set up (for extension number sequences within the same locations. To keep things consistent.
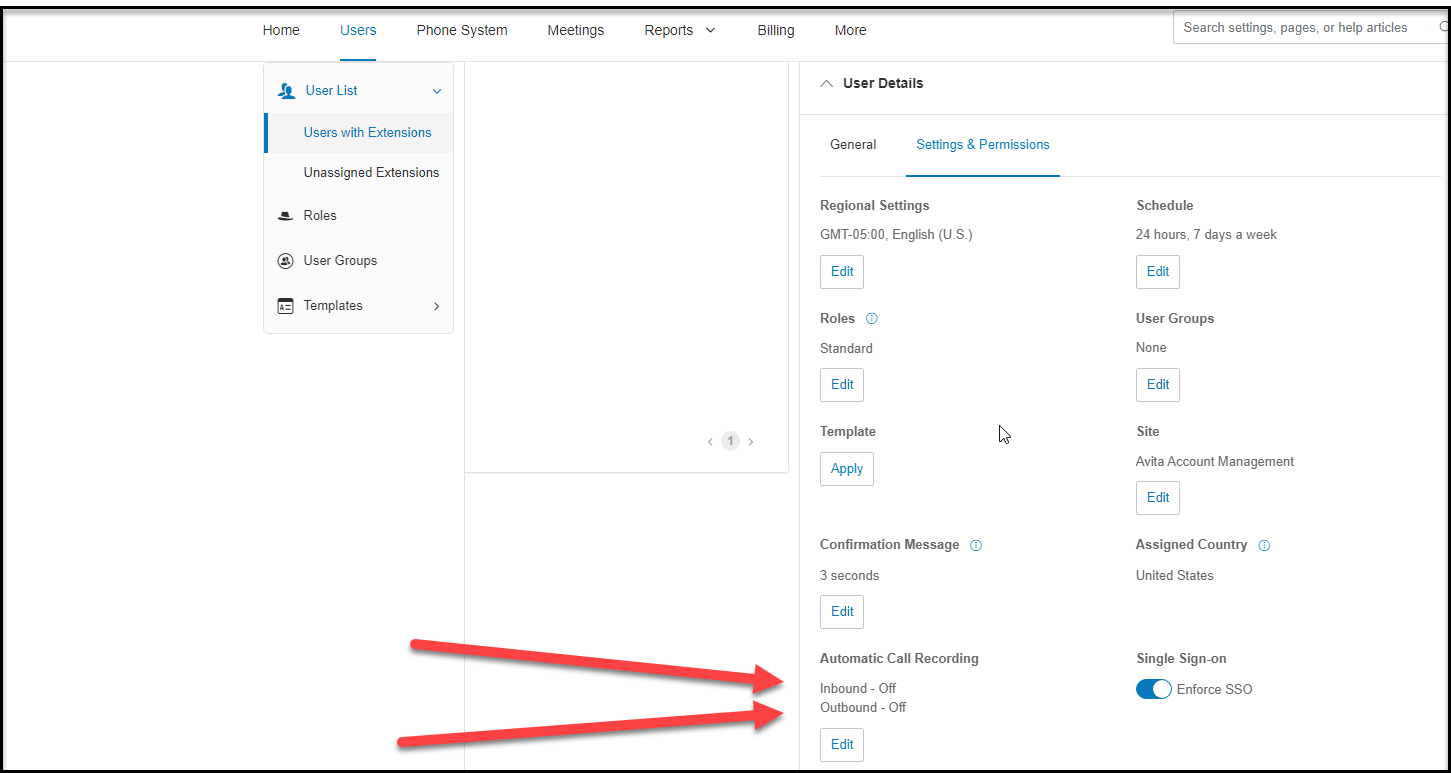
NOTE: For 1051, 1063, & 1040 sites enable automatic call recording on inbound and outbound call on there new extension)
Once Extension is created go back and turn this on within the ring central account .
Before adding an extension, review the current extensions used at the location.
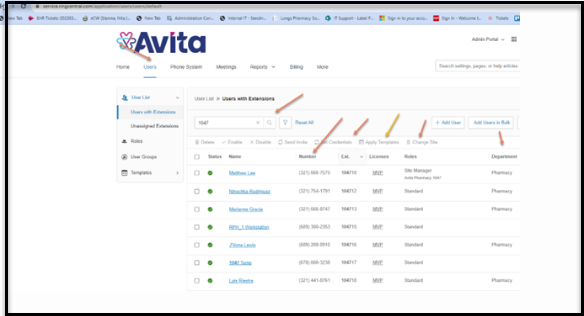
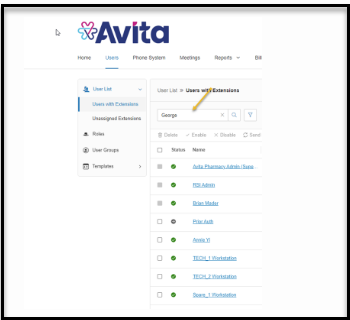
Example: Go over to Users tab, enter the site number in the search field, and hit the Enter key to see all the extensions being used at the site:
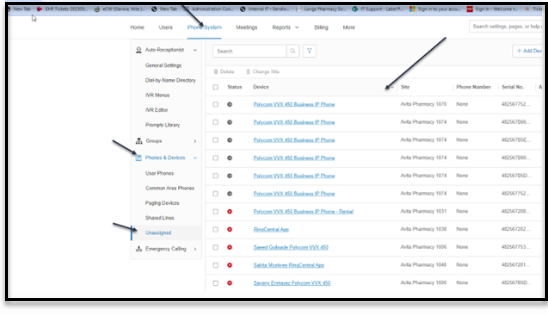
Check if there are unused phone handsets/hardware at the site that need to be assigned to the new extension.
Example: To see this information click Phone the System tab, then on the left-hand side look for Phones and Devices, and then choose Unassigned. This will display a list of unassigned phones:
Also, we need to see what extension numbers are available to select.
Go to the Users tab and type the site number in the search field. It is best to use the filter button to open all the filter options.
Typically inside the Filter, you will find a Site drop-down menu. It's best to use this to select just the site that you are working on. This way, you don't accidentally include extensions that are NOT in the Site that you are working with:
For example, if you're working on-site 1048, if you just type in "1048" it would include "410488" as well as all extensions that start with "1048".
Then hit the Enter key to bring up all the extensions at that site as well as the phone number and prefixes used. The type of Licenses the site has as well as the roles and departments are also displayed.
Take note of the next available extension and use that number when creating the new phone extension. Also, check to see what area codes the site is using.
Example:
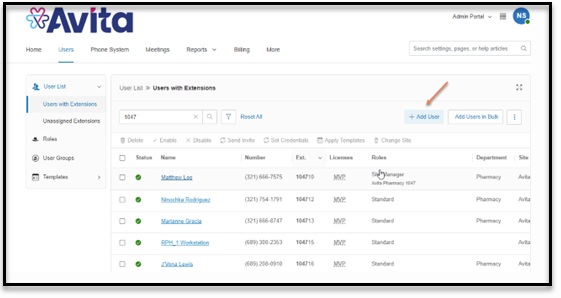
Click on + Add User to and a new extension:
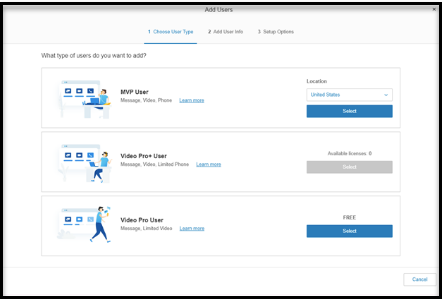
You will choose MVP user then click Select:
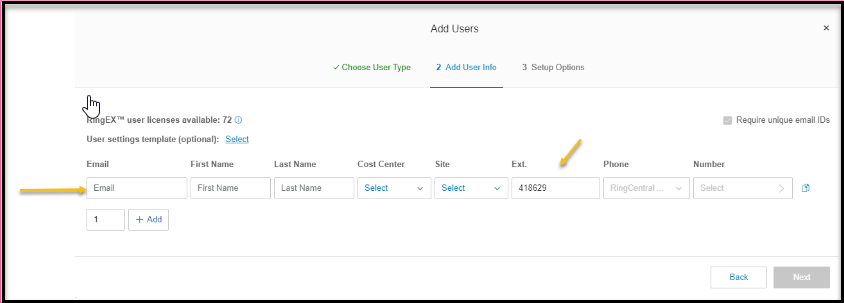
Fill in all information required and hit Next:
NOTE: The extension number will change by the site you will be creating the account for.
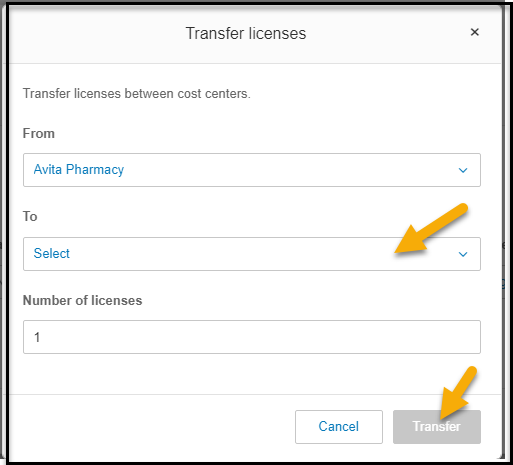
Click on Avita Pharmacy, then Click the Elipses:
Choose what site then Click Transfer:
These licenses can be used across all sites.
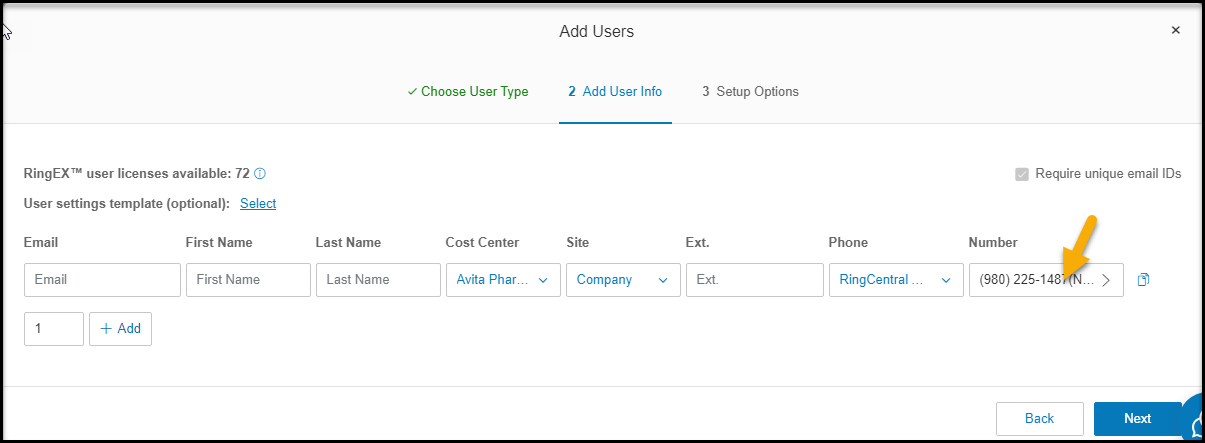
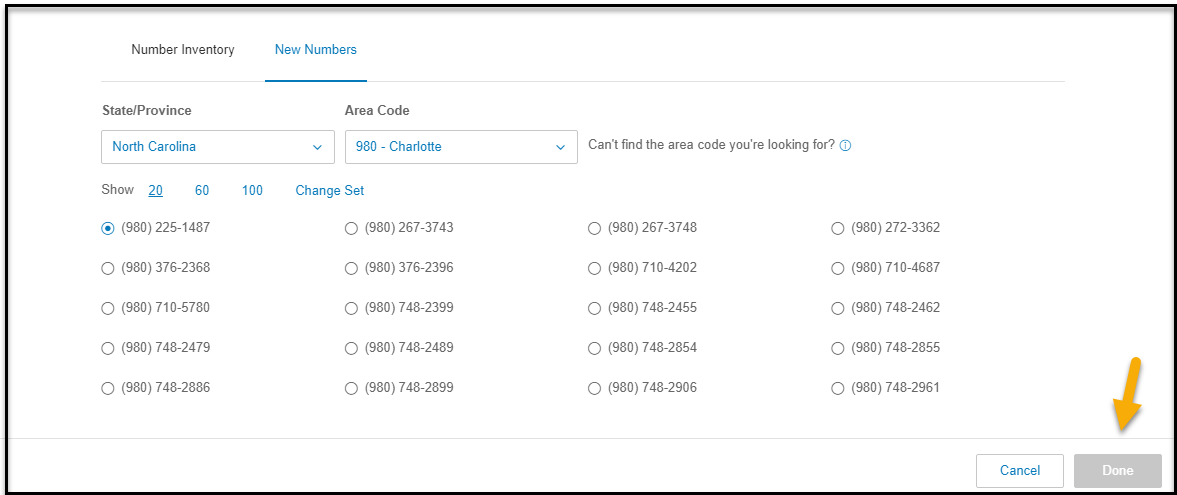
Click on the number column then Click next:
Choose the number with the area code for the site then Click on done:
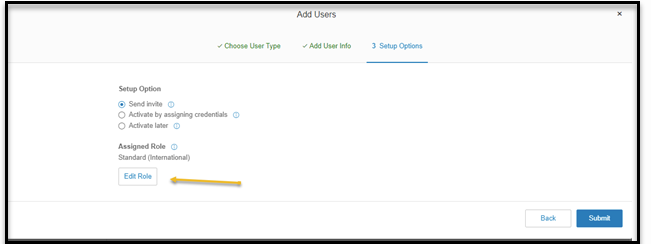
You will then see this licensing screen. Send Invite is selected by default. RingCentral will send the person an invite so they can set up a PIN and activate their account.
IMPORTANT: The Assigned Role has the Standard (International) license by default. Change this to Standard.
Click on Edit:
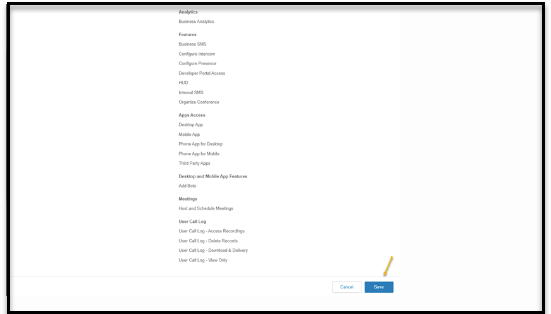
Select Standard then Click save:
Check the box to Acknowledge your changes and click Next:
Once the account has then been created.
You can search for the customer in Ring Central users with extensions:
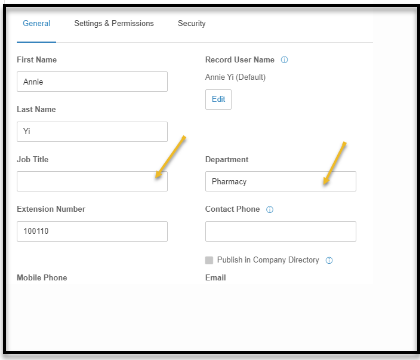
Select the new account and Click the user details tab to update the Job Title and Department. Then scroll down and Clicksave: