Table of Contents
Endicia Install and Integration Setup

USPS Endicia Install and Integration Setup

Before starting this setup please note that Endicia needs to be configured for one user only. The install can be done under an Admin user but once the software is installed make sure you are configuring the integration piece under the user that will be shipping and that the site knows to only use that user when shipping
Installing Endicia
- Open this URL to Download Endicia: https://help.endicia.com/hc/en-us/articles/21873604498587-Download-the-Latest-Endicia-PC-Software
- Select Endicia Professional only as Dazzle is not needed anymore > Click Install
- After install is finished, switch to the Windows Shipping Profile
- Open Endicia
- Fill in these Fields:
- Account Number and Pass Phrase = Same as Web Portal Username/password”
- Name: Shipping Dept
- Company: Avita ####
- Address 1
- City
- State
- Zip
- Phone number
- Click Edit Return Label Address and Account and Copy the same info into those fields
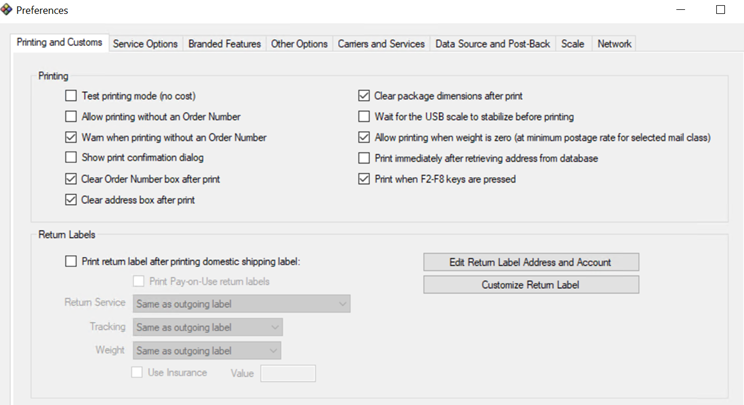
- Click Edit > Preferences
- Uncheck Test Printing Mode
- Check Allow printing when weight is zero(at minimum postage rate for selected mail class)
- Click on “Data Source and Post-Back” tab
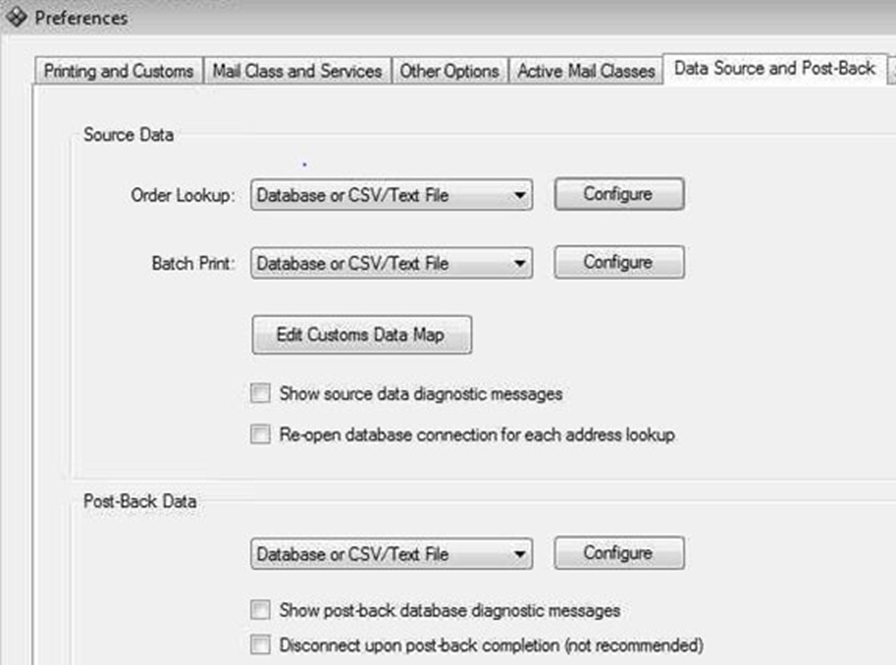
- Click configure on “Order Lookup” (Leave as “Database or CSV”)
- Click New > Click Next >
- Select ODBCConnection: Connect to any ODBC compatible database using a data source previously created in Windows ODBC Control Panel > Click Next
- In Dropdown, Select the created ODBC database (ex: PioneerRx Shipping)
- Enter Shipping Username
- Enter Shipping Password
- Click Next
- Click OK
- Click Next
- From Dropdown Select “PointOfSale.SaleTransactionShippingAddressView"
- Click Next
- From Dropdown Select “Barcode”
- Click Next
- Click Ok
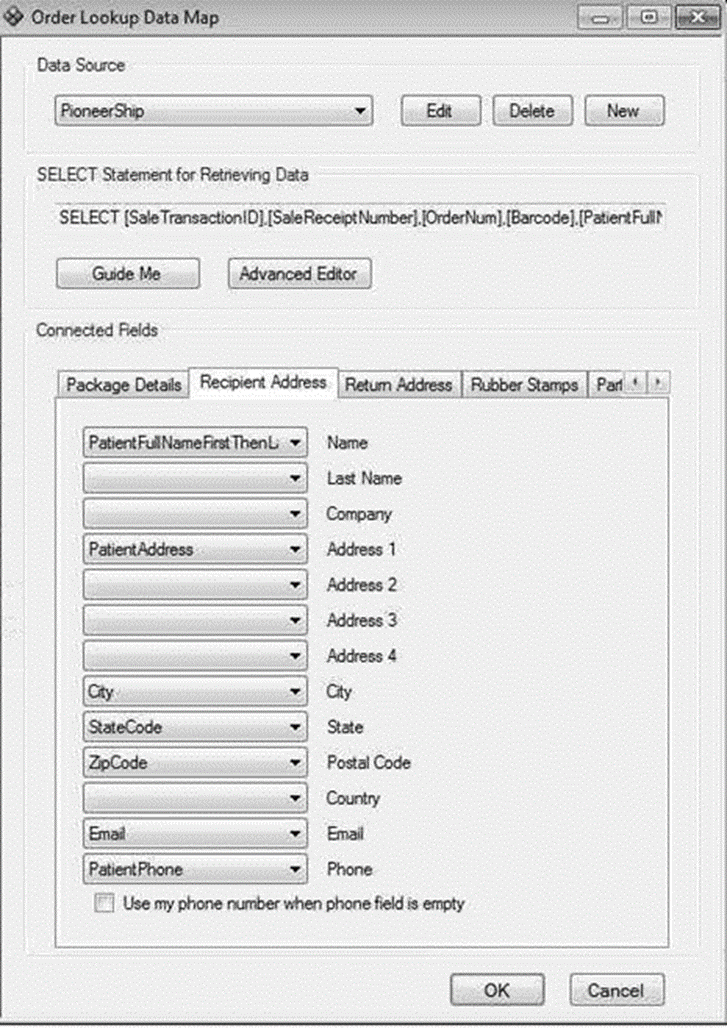
- Click the Recipient Address tab
- Name: Choose “PatientFullNameFirstThenLast”
- Address1: Choose “PatientAddress”
- City: Choose “City”
- State: Choose “StateCode”
- Postal Code: Choose “ZipCode”
- Email: Choose “Email”
- Phone: Choose “PatientPhone”
Creating the Export map in Endicia
- Next to Post Back Data, Click Configure
● New (Paper symbol) > Next
● Select ODBCConnection: Connect to any ODBC compatible database using a data source previously created in Windows ODBC Control Panel > Click Next
● Select DB (ex: PioneerRx Shipping)
Enter Shipping Username (From Hardware)
Enter Shipping Password (From Hardware)
Click Next > Click OK
- Next to Table, Click Select
- Table should be “PointOfSale.Shipment”.
Click OK > Click Select next to Order Number
Click OK >
Click Options next to Post Back Data…”
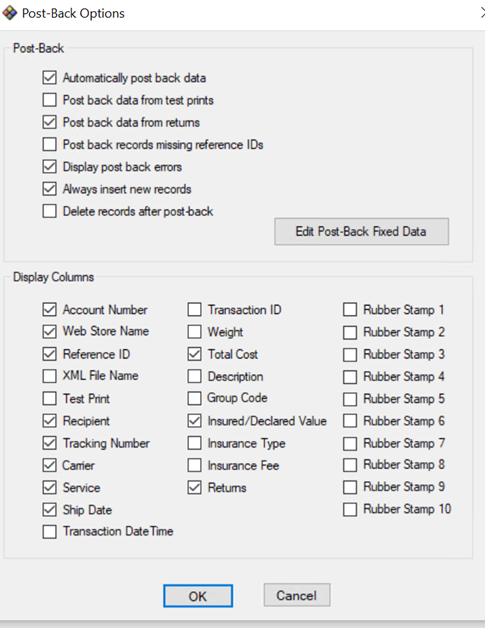
- Uncheck Post back data from test prints
- Check Automatically post back data
- Check Always insert new records
Common Troubleshooting steps
- SQL database errors (In most cases if you see an SQL database error this will likely have something to do with external communication between Avita and the Pioneer hosted SQL server. Here are some things to check before escalating)
- Check the ODBC connection. In some cases you may see mismatch Database architecture errors this is due to the wrong ODBC Connection Configurator being used. Use 32bit exclusively.
- If the ODBC connection does not show up in the list when selecting your data source for Endicia configuration, again check the ODBC connections that are already configured. In some cases Endicia wont recognize System DSN so using the User DSN you can set it up again and restart Endicia afterwards to see if its now showing up. In rare cases this could also be due to an outdated version of Endicia being used.
- If database errors need to be escalated please escalate to Tier 2 first.