Applications
Mimecast
Accessing Avita apps using Remote Desktop
BitRaser Wipe
Change Email Address in 1Password
How To Find A Computer Name
How to Connect to Remote Desktop - Financial or Other Apps
How to Request Archive Server Access
How to Sign into Concur
How to Update eCW Plug-In
How to make Adobe Acrobat the default PDF reader
How to update distribution list members
Jamf Pro: End User Pre-Stage Enrollment Guide
Providing Archive Server Access
Sending Email from Shared Mailbox
Setup 1Password with Microsoft Entra
Starting Development VMs after 10PM CST during and over the Weekend
Switch from Adobe ID to Federated ID
Syncing favorites and passwords in Edge
Update Adobe Sign Email
Update Policies on Remote Computers
Updating QS/1 Archive Server Client Connections
Updating eCW Plug-In
Using CaptureOnTouch with your Canon Scanner
Avita Service Connect
Accessing Avita Service Connect - External Partners
How to use Avita Service Connect, our new IT service portal
Unlocking an eCW record after approval is granted
Internal Facilities
ADT Control Panel System Reboot (Command 7" Touchscreen AIO ADT7AIO)
How to Run ADT Activity Reports Filtered by Date/Location
Internal IT
Applications
Add New Departments to Aquera Orchestrations
Setup Dispill Printer Settings
Turning on User Access Control
Hardware
How to Prepare Thumb Drive to boot from USB
How to Verify Disk Encryption
Scanner - Desktop Scanner Driver Issues
Intune
Microsoft 365
Phone
Ring Central Menu Map (IVR) Review
RingCentral Faxing from Workstation
Setting up after hours calls to route to the Doctors' Exchange answering service
Printers
Procurement
How to Check Warehouse Stock
How to Create a FedEx RMA
How to Create a ROPAAU Form
How to Create and Delete an Asset in Asset Manager
How to Find an Asset Tag for a Device
Standard Naming Convention for Assets
Termination Process - Hardware
Shipping
Endicia Install and Integration Setup
FedEx Shipmanager Install and Setup
ODBC Setup Guide
UPS Worldship Install and Integration Setup
How to create a Helpdocs article
Jamf Pro Enrollment Guide
Upgrading Windows 10 to Windows 11
Microsoft 365
Activating Microsoft Entra Privileged Roles for Service Desk team members
Add Outlook account to macOS
Enabling and Using Passwordless Sign-in with Microsoft Authenticator app
Encrypting Emails in Outlook
How to Add Phish Alert Button
How to add an email signature in Outlook
Install Microsoft Outlook app on mobile device
Managing Distribution Lists You Already Own
Microsoft Application Policy Installation - Android
Microsoft Application Policy Installation - iOS
Migrate content to OneDrive
New Hire Instructions For Updating Windows Password and MFA
QCarePlus Device Migration
QCarePlus Outlook Migration
Re-adding Outlook Account on Mobile Device
Reconnect MFA Authenticator App with Number Matching
Reinstalling the Intune Company Portal on Android
Restoring Files in OneDrive
Self Service Password Reset or Unlock account
Setting up the alerts for the SharePoint folders
Sharing HIPAA Documents
Sharing emails and files securely
Updating email address in Microsoft 365 apps
Phone
PioneerRx
Connecting a Monitor to a PioneerRx Server
Equinox Luxe - Pioneer Installing the Luxe 8500i Signature Pad
How To Replace a Power Supply In Your PioneerRx Server
PioneerRx Support Process
eCW
- All Categories
- Internal IT
- Procurement
- How to Create and Delete an Asset in Asset Manager
How to Create and Delete an Asset in Asset Manager
Updated
by Milan Ingram
How to Create an Asset
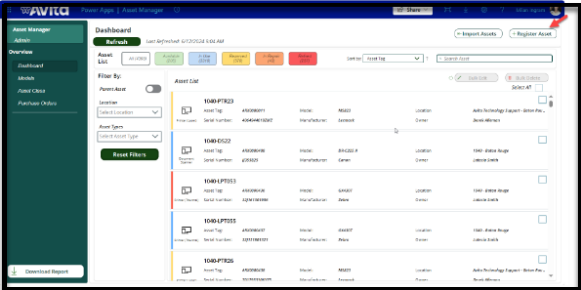
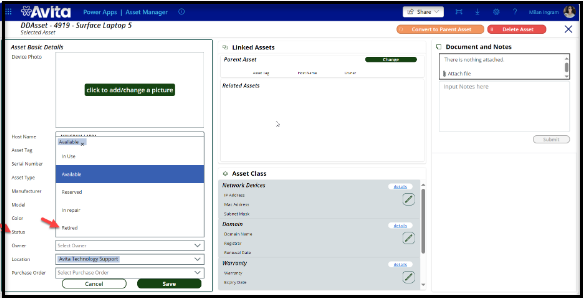
- Click on Register Asset:
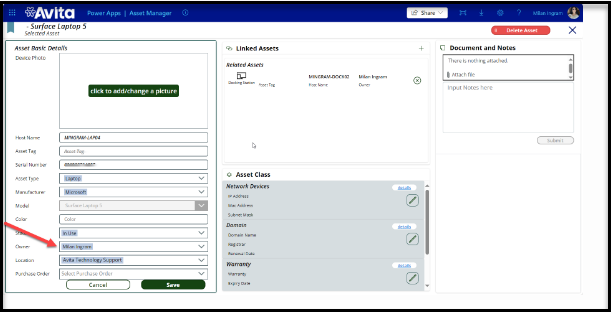
- Fill out every field with the asset information.
- Host Name - check the Standard Naming Convention for Assets HelpDoc for the naming scheme
- Asset Tag - Ask the customer for the asset tag number. If an asset doesn't have an asset tag, leave what is generated in the field - check How To Find Asset Tag for a Device HelpDoc to double check if it has one or not.
- Serial Number
- Asset Type - Select the asset type for the device. Please confirm an asset type doesn't already exist prior to selecting Other to create a new one
- Manufacturer - Select the manufacturer for the device. Please confirm a manufacturer doesn't already exist prior to selecting Other to create a new one.
- Model - Select the model for the device. Please confirm a model doesn't already exist prior to selecting Other to create a new one.
- Photo - upload a photo if creating a new device model. Amazon is great place to find pics of devices that are compatible.
- Color - Optional field
- Status - Make sure the status is in use if it's installed at a site or being used
- Location - Select the location of the customer. For internal warehouse stock, use Avita Technology Support - <WarehouseLocation>
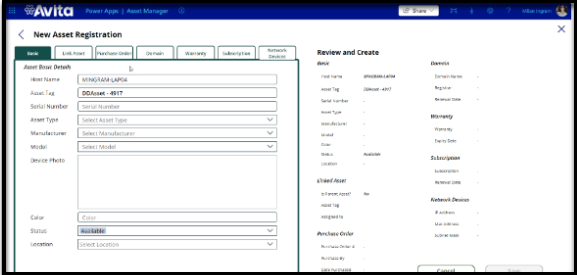
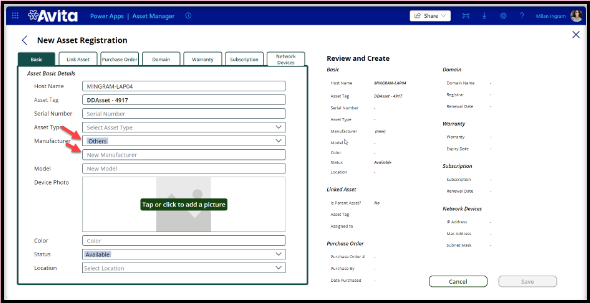
- If you don't see the manufacturer and model listed once you Search, type in others in the drop-down then type in the new manufacturer to Create a new one:
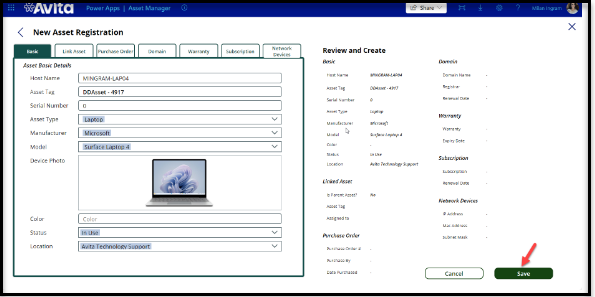
- Once you have filled out all the basic details, Click save:
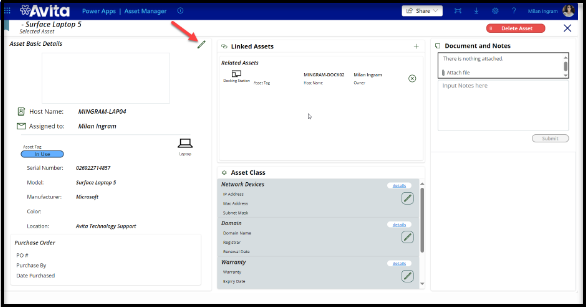
- On the home screen, Search the device you created in the search bar and Select it:
- Click the pencil icon to edit the asset:
- Search for the correct owner of the device in the owner drop-down and save:
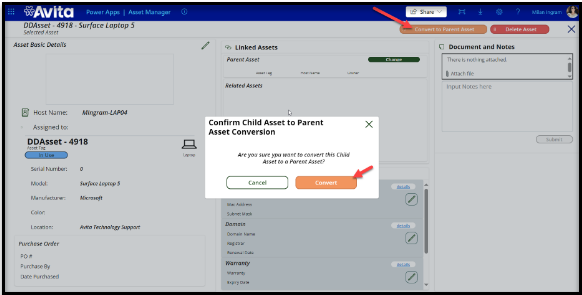
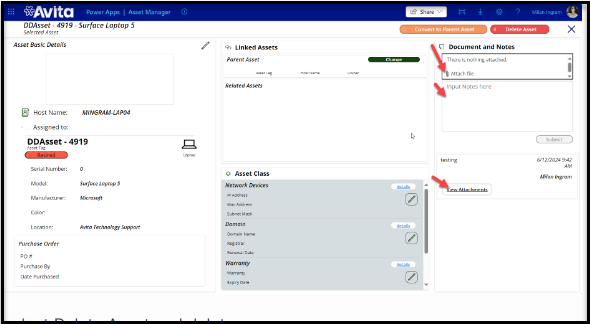
- If the device is a computer, it is a parent asset. Select convert to parent asset if not done already:
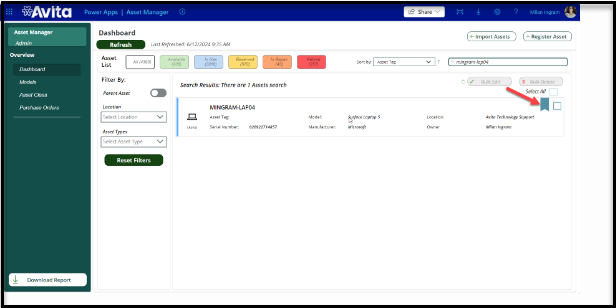
- To check if it converted to a parent asset, you should see this icon on the asset:
How to Delete an Asset
- Change the status to the asset to retired then Save:
- Once an asset has been picked up/shipped to the ITAD vendor and you received the Certificate of Destruction (COD), select attach file and add the COD to the asset, input the note, and click submit. For computers, attach the encryption verification as well. You can view your attachments by clicking view attachments:
- Then Select Delete Asset and delete:
