Applications
Accessing Avita apps using Remote Desktop
How To Find A Computer Name
How to Add Phish Alert Button
How to Connect to Remote Desktop - Financial or Other Apps
How to Request Archive Server Access
How to Sign into Concur
How to Update eCW Plug-In
How to make Adobe Acrobat the default PDF reader
How to update distribution list members
Providing Archive Server Access
Sending Email from Shared Mailbox
Syncing favorites and passwords in Edge
Update Adobe Sign Email
Update Policies on Remote Computers
Avita Service Connect
Accessing Avita Service Connect - External Partners
How to use Avita Service Connect, our new IT service portal
Internal Facilities
ADT Control Panel System Reboot (Command 7" Touchscreen AIO ADT7AIO)
How to Run ADT Activity Reports Filtered by Date/Location
Internal IT
Applications
Add New Departments to Aquera Orchestrations
Setup Dispill Printer Settings
Turning on User Access Control
Hardware
Microsoft 365
Creating a ReveleMD Cloud Account (or Quest)
Grant OneDrive Access to Manager for Termed Account
How to Upload SafeID Hardware Token to Entra ID
Onboarding-Offboarding
Phone
Assigning a Ring Central Customer to a Physical Phone
Automatic Call Recording
Creating a Non-Holiday Rule
Creating a RingCentral Extension
How to Add Paging to Ring Central Phone
How to Add a Customer to Ring Central Phone Tree
Removing Ring Central User Account from Call Queue Group
Ring Central Call Notifications
Ring Central Temp Account for Floaters
Ring Central – Adding Park Locations
Transferring a Ring Central License
Plano
Procurement
Shipping
Endicia Install and Integration Setup
FedEx Shipmanager Install and Setup
ODBC Setup Guide
UPS Worldship Install and Integration Setup
How to Prepare Thumb Drive to boot from USB
How to create a Helpdocs article
Upgrading Windows 10 to Windows 11
Microsoft 365
Activating Microsoft Entra Privileged Roles for Service Desk team members
Add Outlook account to macOS
Encrypting Emails in Outlook
How to add an email signature in Outlook
Install Microsoft Outlook app on mobile device
Managing Distribution Lists You Already Own
Microsoft Application Policy Installation - Android
Microsoft Application Policy Installation - iOS
Migrate content to OneDrive
New Hire Instructions For Updating Windows Password and MFA
QCarePlus Device Migration
QCarePlus Outlook Migration
Re-adding Outlook Account on Mobile Device
Reconnect MFA Authenticator App with Number Matching
Reinstalling the Intune Company Portal on Android
Restoring Files in OneDrive
Self Service Password Reset
Sharing HIPAA Documents
Sharing emails and files securely
Updating email address in Microsoft 365 apps
Phone
PioneerRx
Connecting a Monitor to a PioneerRx Server
Equinox Luxe - Pioneer Installing the Luxe 8500i Signature Pad
How To Clean Your TSC Thermal Printer
How To Replace a Power Supply In Your PioneerRx Server
eCW
- All Categories
- Internal IT
- Phone
- Ring Central Temp Account for Floaters
Ring Central Temp Account for Floaters

Creating and Activating a Floater Ring Central Account
- Login to Ring Central Admin Portal
- Once logged in, Click on the Users tab, then Search for the site number where the account needs to be created:

- Follow this document on Creating a Ring Central Extension
Example:
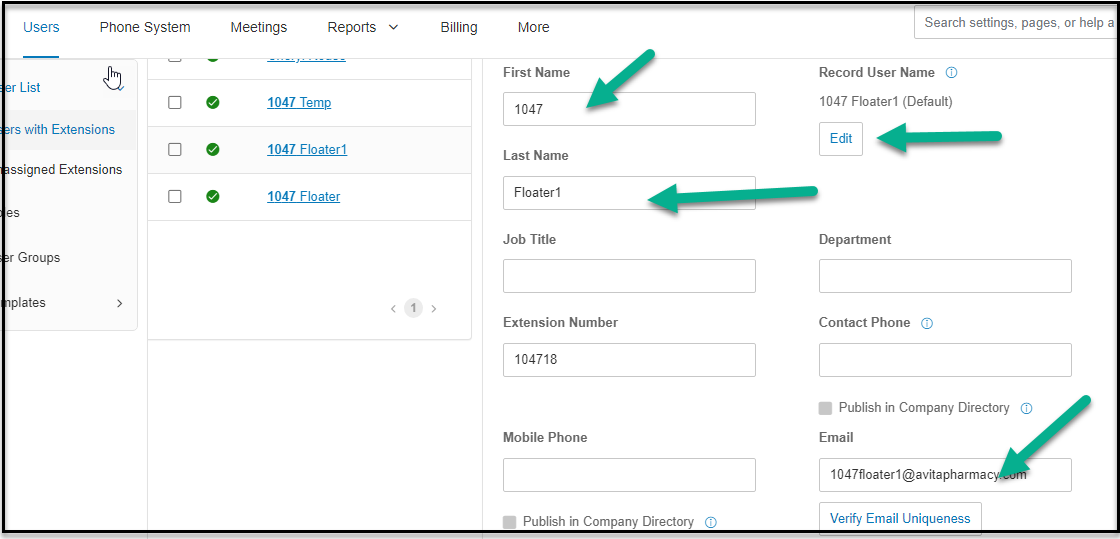
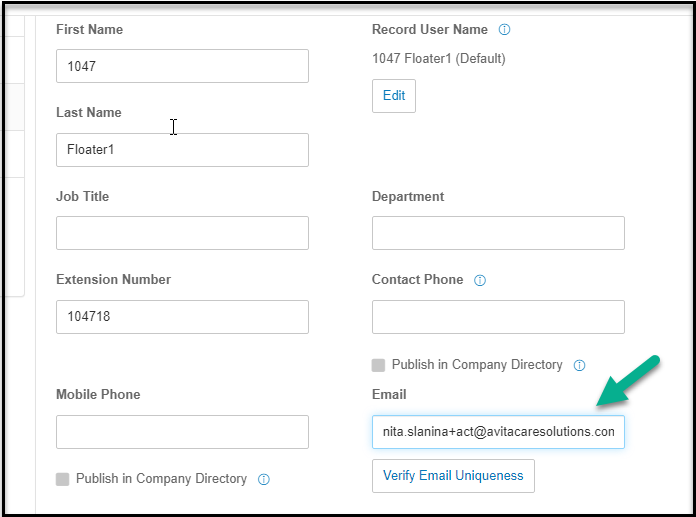
- Once the account has been created, to activate it, you will need to go into the user details and change the email to nita.slanina+act@avitacaresolutions.com (your account name, including the +act).
Example:
- Once you change the email to nita.slanina+act@avitacaresolutions.com (your account name including the +act) this will send you an email to activate the account.
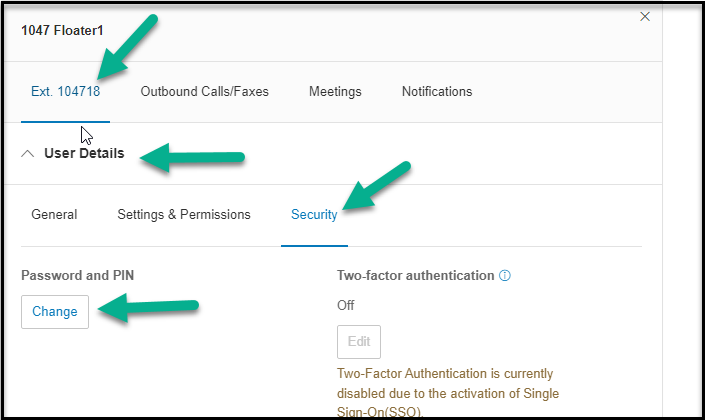
- Activate the account from the email and set a PIN and Password on the account (you will give this to the customer to test the extension)
Example:
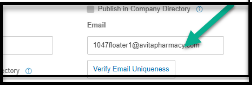
- Then go back into the account you created and Change the email back to the original unique email you created.
Example:
- Once the account is activated, you will need to go into the group membership settings and add them to the groups needed.
Example:
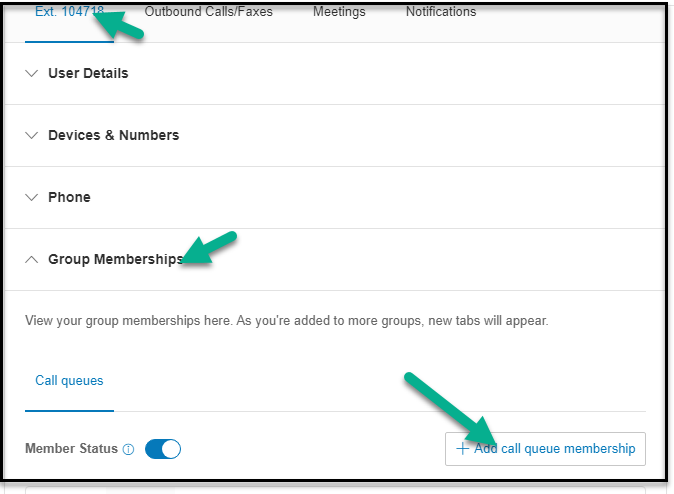
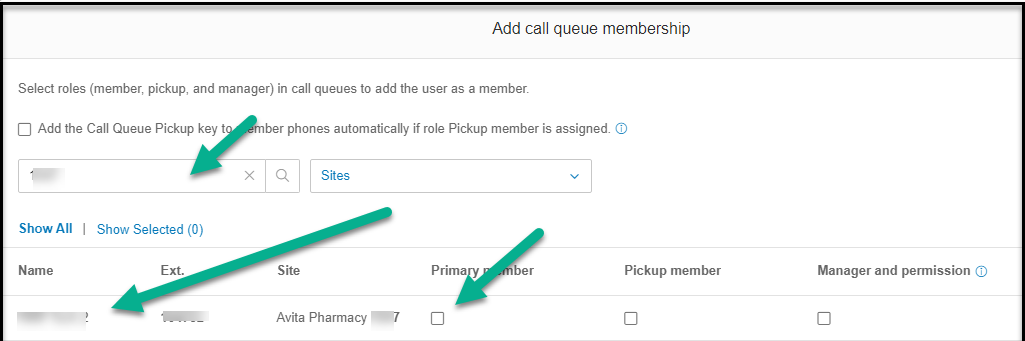
- Search on the site, then Choose what call queues that are needed, then click on the Primary Member, then Save:
Example:
- Then go to the account you created, go to Outbound calls and faxes, and then to Caller ID to make sure the store number is correct.
Example:
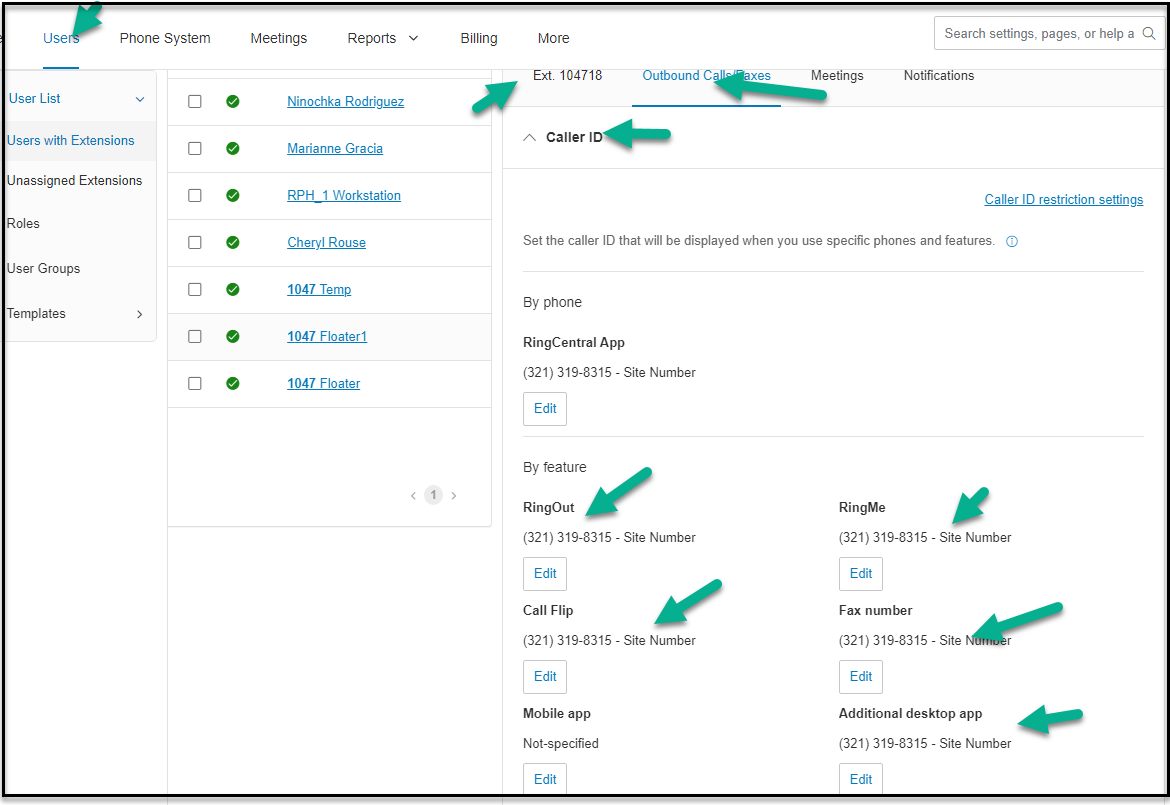
- If incorrect, change this to the correct store.
- Click Edit underneath the number:
Example:
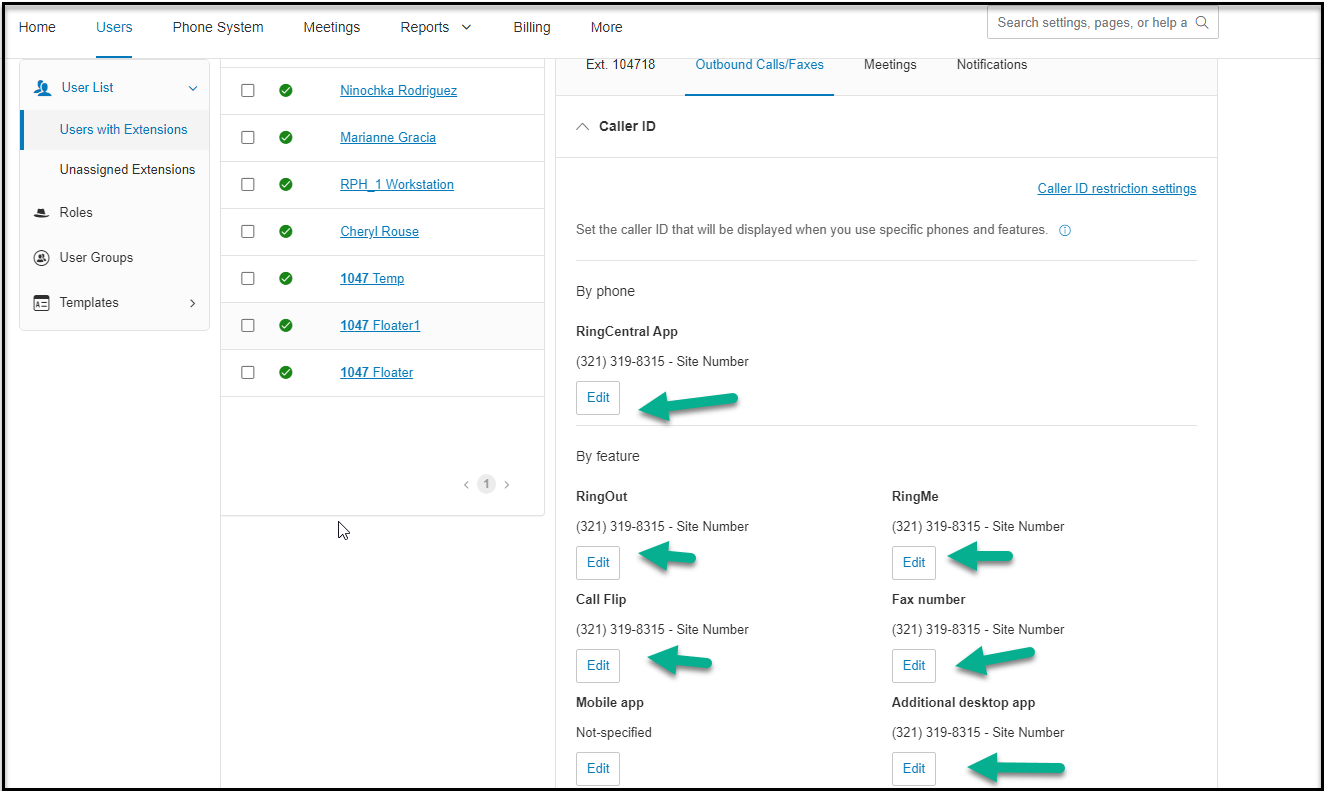
- Type in the site for the number needed, click on the search icon, choose the main number of the site. Do this for all numbers listed within the caller ID screen for the account and click Done to save it.
- Once this has been completed, please have the customer test with the login and pin supplied.